MD RAID Setup
These instructions only apply if the MultiDevice ISO installation media was used. If the two drives are not the exact same size then the smaller drive must be the drive selected during installation. There is no way to add a second drive to a RAID array if it’s not at least the same size or bigger then the first drive.
Warning
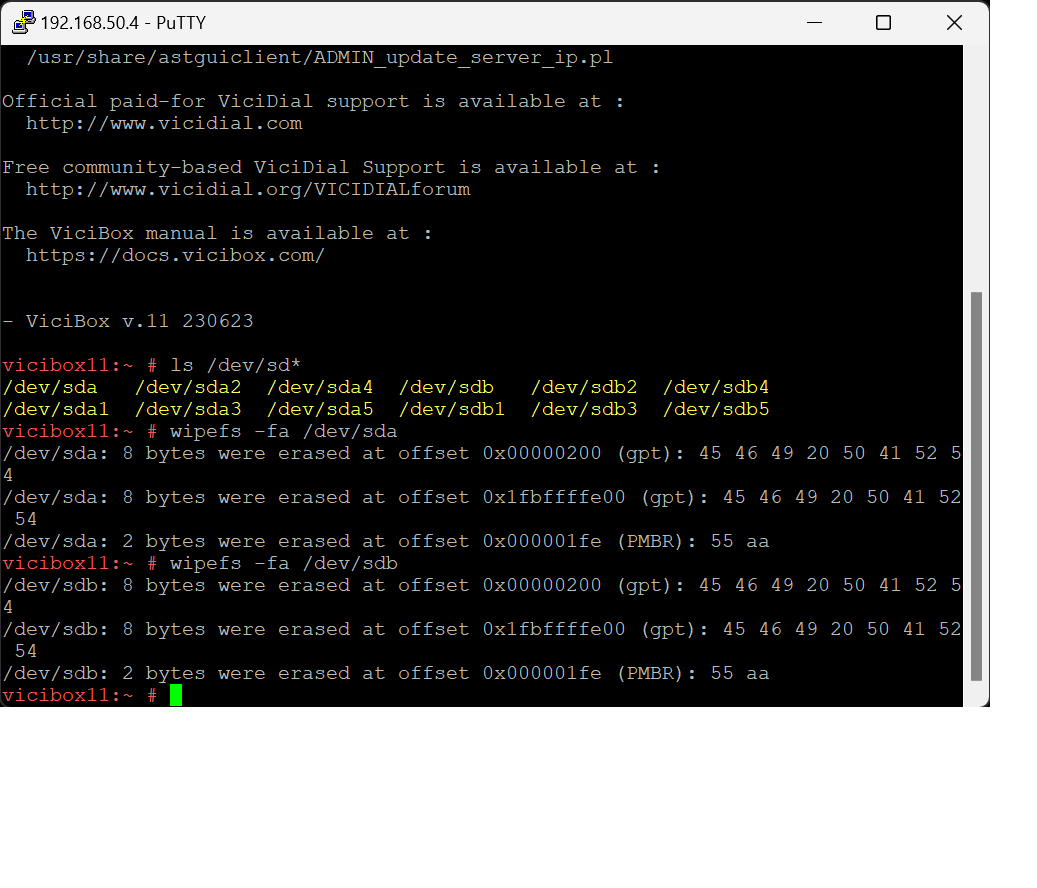
MD RAID setup can be temperamental. If there are any problems during the installation it’s recommended to wipe all drives and start over. That can be done by running
wipefs -fa /dev/sdaandwipefs -fa /dev/sdbprior to reinstalling.
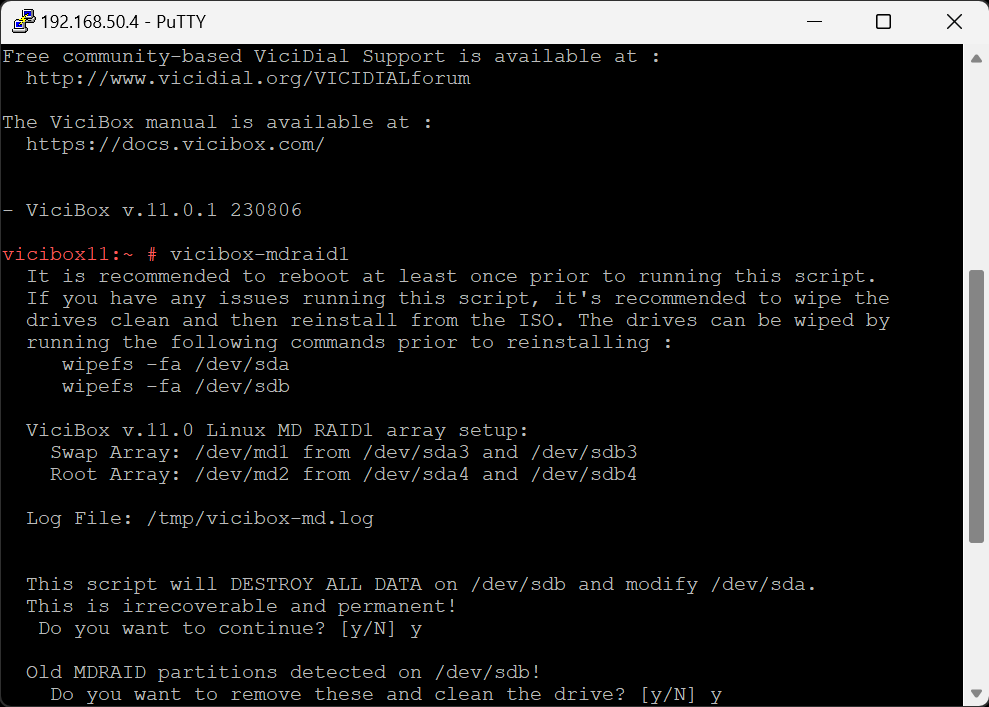
vicibox-mdraid1
If not already, login as the
rootuser to get to the # command prompt.Type
vicibox-mdraid1and pressENTERto start the setup process.A summary of what will be done is shown. Type
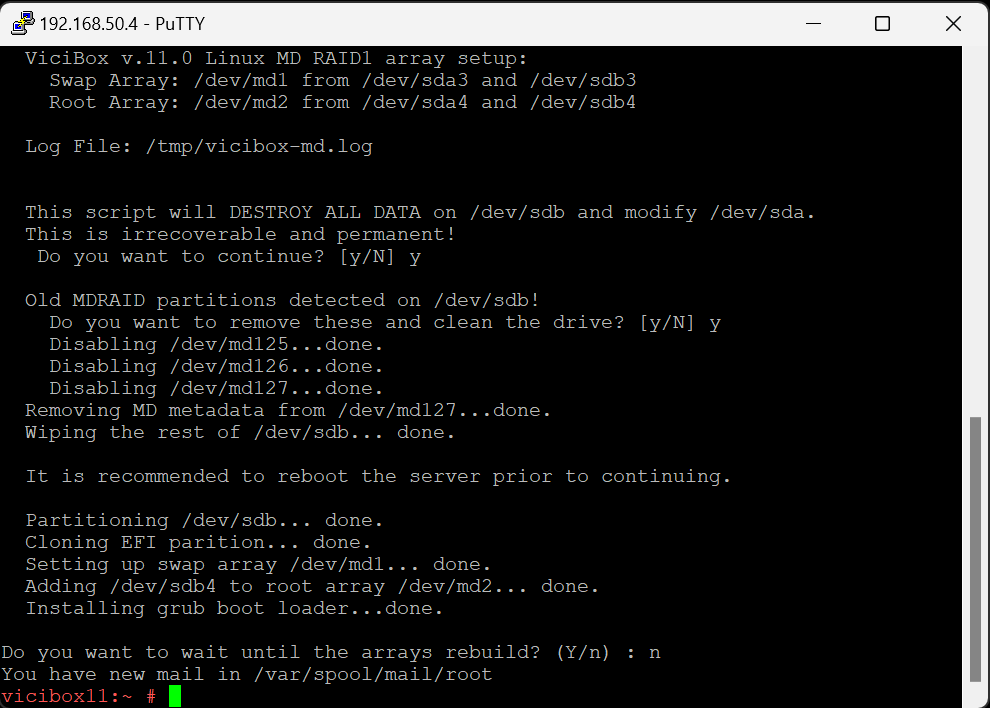
Yand pressENTERstart setting up the RAID array.If any old RAID arrays are found the script will prompt if you want to remove them. Type
Yand pressENTERto remove the old arrays.When done, it’s recommended to return to the command prompt instead of watching the arrays rebuild. Type
Nand pressENTERto exit to the # command promptTo check the status of the MD RAID arrays, type
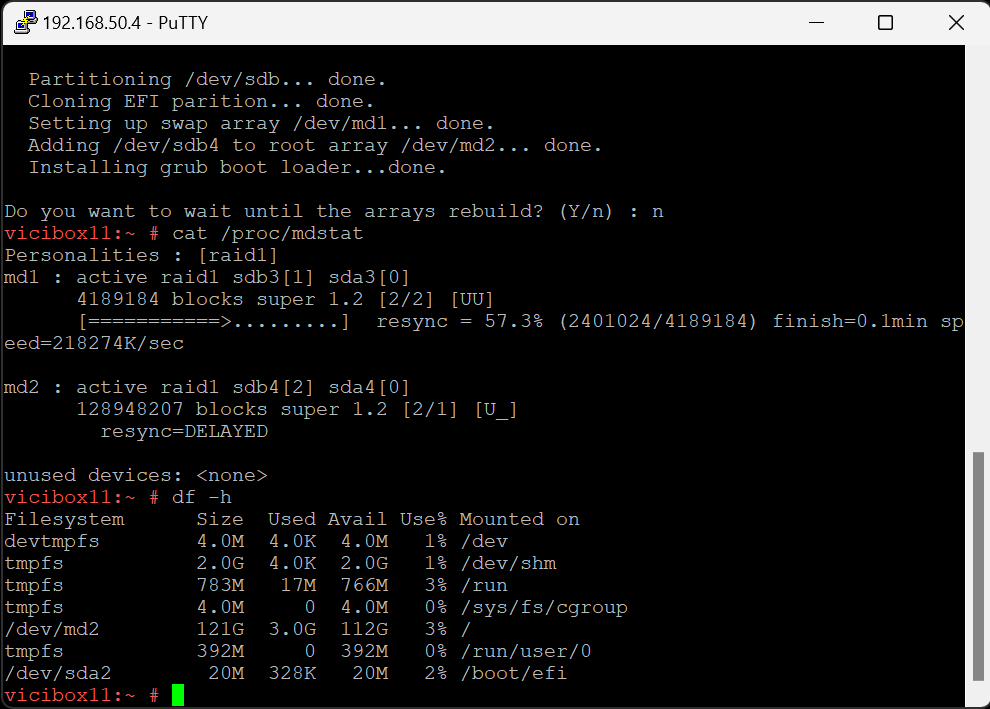
cat /proc/mdstatand pressENTER. md1 is the swap array and md2 is the root array.While not strictly necessary, it’s advised to reboot the server at this time. Type
rebootand pressENTERto reboot the server.


